Getting started: Start your Account
Mar 20th 2023
1. SignUp
Open kleio.com in your browser and click on "Sign up" and then on "No account yet".
Now follow the dialogs and enter your details. The alternative name would be, for example, the name of the collective, the collection or the exhibition space, etc.
Accept the terms, which you can read beforehand, of course, and confirm with Sign up.
Please check your email inbox and click on Confirm email address in the kleio mail, which will bring you back to your account.
Everything is ready and you can test all kleio functions for 30 days free of charge and without obligation.
You see your profile record. You can complete it with a picture and further information or continue with new records.
2. Record erstellen
Press the + symbol and create your first record.
On the left side you can fill in the suggested fields, on the right side you can upload pictures and documents.
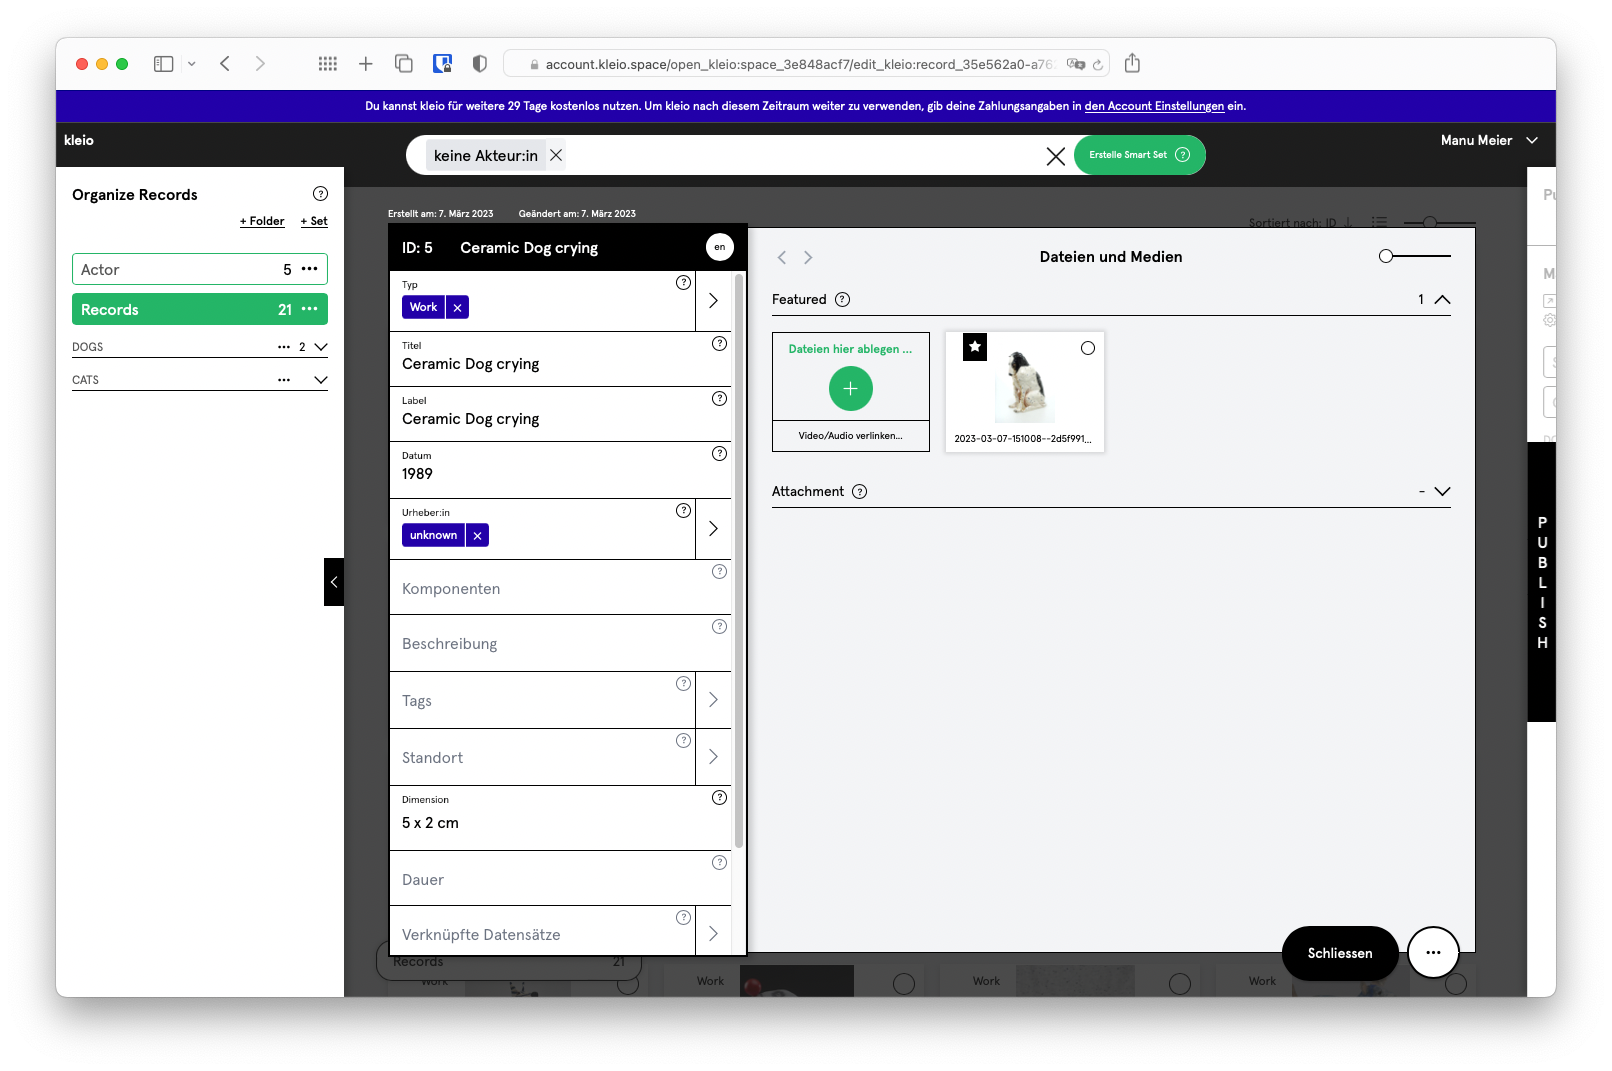
If you are missing fields to describe your work, press the three dots at the bottom right of the record and select "Edit fields". You can customize a record completely according to your needs and save it as a record template by selecting "Create template" at the bottom right of the field selection.
Confirm your entries in the record with Save and Close.
3. Organize
In the left panel "Organize" you can set up your individual filing structure. Create sets and drag and drop records into your sets. You can structure the sets using folders.
Various export functions are available via the action menu at the bottom left.
4. Publish
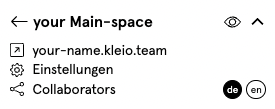
If you want to publish your records as a website, the right panel PUBLISH is available. In kleio we call all published compilations Spaces. The first Space, the so-called "Main-Space" is already created for you. In the set "About" you can find your profile record. Of course you can remove it from the Space. Create a storage structure in the space, which will be displayed as navigation on your website. The topmost set will be the landing page, i.e. it will open when you call up your page.
Now drag the records into the sets you want to publish and set the sets to "published" by clicking on the three dots and then on the cogwheel to open the set settings.
Here you can also make further settings later, such as whether your records are displayed as a list or as tiles, or whether with or without a sidepanel. Try out here what suits you.
Now you only have to check the settings of your Space and publish it as well. To do this, press "Settings" on the Space.
You can change the title of your main space. This title will be displayed as header on your website. By default your account name is displayed here.
kleio will automatically create a public URL from your account name. You can change this URL in your account settings in the top right menu with your account name. Also in the account settings you will find the section imprint. Please fill in your information there, because in Europe the display of an imprint is required by law.
Back in your Space Settings, check if the field setting is what you want and set the design under Display Options.
Finally you can set the display congestion to "Visible" by clicking on the eye. Now your space is published.
On the right side of your Space you will see your URL and an arrow next to it. Press on this arrow to admire your kleio Space in the now public view.
More info about PUBLISH.