Getting started: accept invitation
Mar 20th 2023
How do I accept an invitation, create my free profile and connect to a Collaborative Space on kleio?
You have received an email invitation to a Collaborative Space on kleio.
Press accept invitation.
Now follow the dialogs and enter your details to create a free profile. The different name would be e.g. the name of the collective, the collection or the exhibition space, etc.
Accept the terms and conditions which you can of course read beforehand and confirm with Create account.
Please check your email inbox and click on confirm email address in kleio's mail, which will bring you back to your account.
Open the Profile Record - this is the record that contains your information.
Add your information on the left side and import one or more pictures if you want.
Now open the right panel PUBLISH. There you will see the invitation of the collaborative space you have been invited to.
Accept the invitation and drag your profile record into the set, into this collaborative space - if you have been invited to represent a community. Now you are part of the community.
If you want to publish your profile as an independent one-page website, then follow the further descriptions. This is also an offer of the free profile.
You can also set your personal website on the right side in the panel PUBLISH. In kleio we call all published compilations Spaces. The first Space, the so called "Main-Space" is already created for you. In the set "About" you can find your profile record.
Now you only have to check the settings of your Space and publish it. To do this, click on "Settings" at the Space.
You can change the title of your main space. This title will be displayed as header on your website. By default your account name is displayed here.
kleio will automatically create a public URL from your account name. You can change this URL in your account settings in the top right menu with your account name. Also in the account settings you will find the section imprint. Please fill in your information there, because in Europe the display of an imprint is required by law.
Back in your Space Settings, check if the field setting is what you want and set the design under Display Options.
Finally you can set the display congestion to "Visible" by clicking on the eye. Now your space is published.
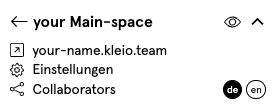
On the right side of your Space you will see your URL and an arrow next to it. Press on this arrow to admire your kleio Space in the now public view.
If you want to test all functions of kleio, create a record and start the 30-day non-binding test phase. Here you can find a short tour.
More information on how to connect to communities or how to start a community yourself.