Space Settings
Mar 20th 2023
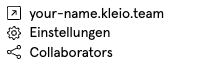
The following icons appear in Space.
The Space shows me the following icons.
Arrow - YOURNAME.kleio.com - switches to the published view of the Space.
Gear - opens the Space Settings
Graph - Shows Collaboratos > Collaboration
This section is about the cogwheel, the Space Settings.
By pressing Space Settings, a window opens where I can set up my Space according to my needs.
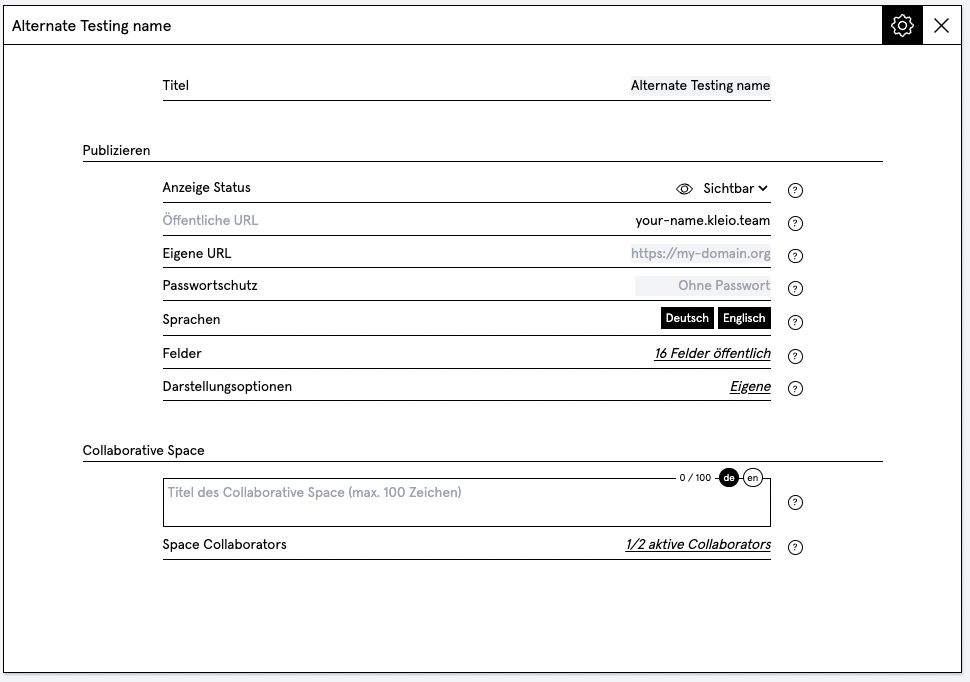
Title
The "Title" is the heading in the Space, i.e. the website title.
Display status
Is the Space still "Hidden" or already "Visible".
Public kleio domain
For my "Main-Space" my kleio main domain is displayed here, which is automatically composed from my account name during signup.
If I want to change this, I can do this in the account settings.
For additional spaces I can enter a term here, which will show up as an addition to my domain and make it a so called kleio subdomain.
Custom Domain
All kleio Spaces can also be connected to their custom domain mydomain.com. This must be set up with your provider as follows.
(Note: If you can not enter the following changes yourself, please contact the support of your provider with these instructions)
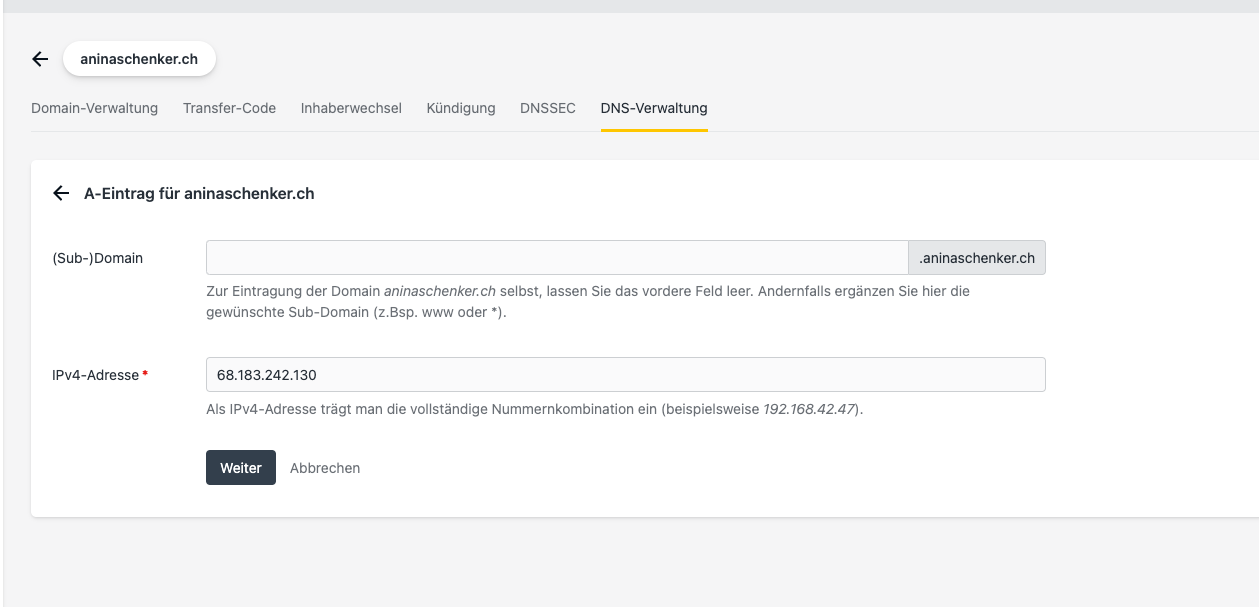
Step 1: Create a DNS record with your provider
Option A – CNAME record
In the DNS settings for your domain or subdomain, add a CNAME record pointing to kleio.com.
- To use your full domain (ex.
mydomain.com): Fill in the "from" value (often called "value" or "host") according to your provider's instructions. Normally this field should be empty - To use a subdomain (ex.
mysubdomain.mydomain.com): Set the "from" value (often called "value" or "host") to the subdomain name (e.g. mysubdomain).
Tip: If you have the possibility to change the "TTL" for the entry, set it to a low number. This way you can see the effects of your new configuration faster.
Option B – A record
In the DNS settings for your domain, add an A record pointing to the kleio IP 68.183.242.130.
Step 2: Update your Space settings in kleio
In your space settings in kleio, add your custom domain in the "Custom domain" field.

That's it! Your public kleio space is now accessible in any browser via your custom domain.
Note: It can take a while for a DNA change to spread around the world.
kleio will secure your custom domain with a certificate to pass browser security checks and be more discoverable (indexed). This will change your http to https. It may take up to 72 hours for the changes to take effect. If you still get an error message after 72 hours, contact us via the support form at kleio.com > support.
www. in the domain
kleio secures the "kleio domains" as well as the "custom domains" of the users by means of a certificate. This ensures that the security checks of the browsers are passed and promotes the findability (indexing). The input of www. in front of the "kleio domain" is no longer supported for this reason.
If you connect your kleio to your "custom domain", you are free to use www. However, you must set up a "redirect" of the other variant. See the following description.
kleio recommends variant A:
A: You have set up a CNAME or A-record on mydomain.com.
Now create a redirect from www.mydomain.com to mydomain.com.
B: Or you have set up a CNAME or A-Record on www.mydomain.com, then create a redirect from mydomain.com to www.mydomain.com.
Password protection
Each kleio Space can be password protected. Enter the password here and give it to the people who will be allowed to see the Space. This function is mainly used when downloading to images has been allowed. Look at Space Settings > Fields
Languages
If the information was entered in multiple languages, it can be displayed in multiple languages on the website. In your Account Settings you can select the languages for your account and set their order. If you have selected multiple languages, you can select or deselect them here in the Space Settings.
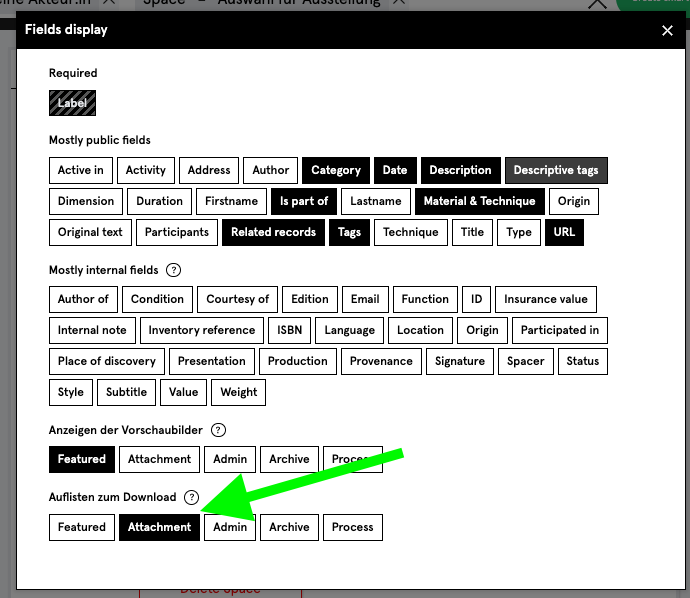
Fields
In kleio you can precisely set which field contents should be displayed in Space and which should remain hidden.
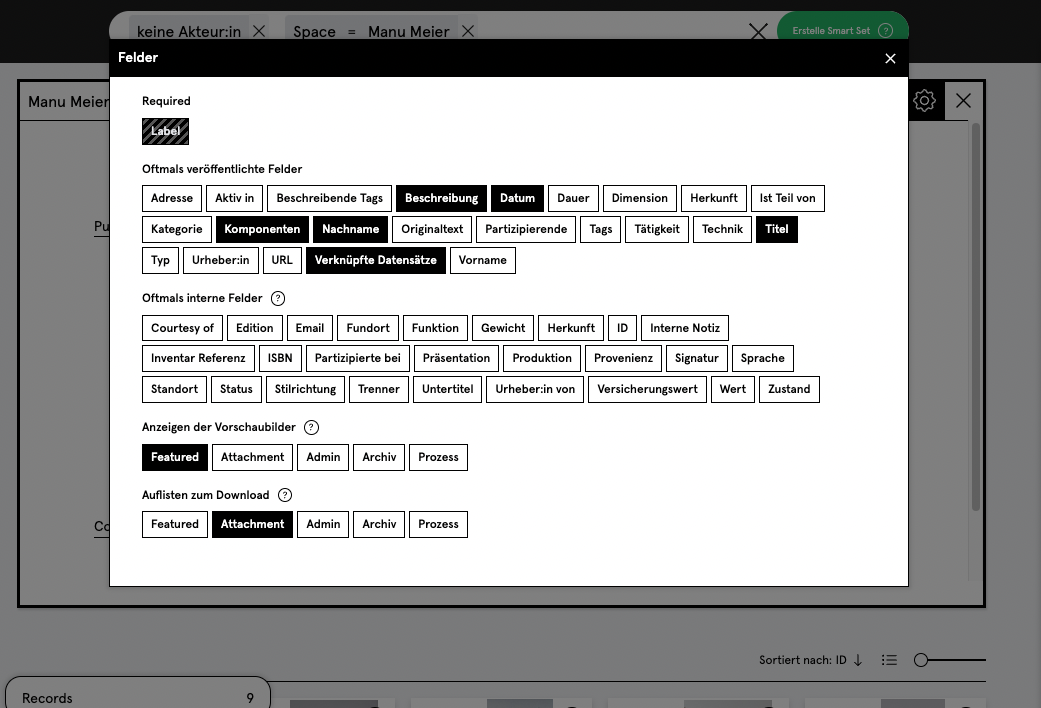
Fields: Download option
Images and data can be released for download. For each folder the download can be allowed. However, it is also possible to specify a folder as the download folder. We suggest the Attachment folder for this purpose.
Display PDF on website
For example, if a PDF is to be displayed on a website, the PDF must be stored in a folder that allows the download, even if the PDF is actually only to be published for viewing. Technically this is only possible if the file has the download permission. Show Siege PDF in Space
Display options
You can customize the appearance of your Space according to some parameters. See Display options.
Collaborative Space
You can invite people to your Space and, for example, display it as a community or publish a digital exhibition together. See Collaboration